Friday, October 16, 2009

I Love you, Spray Paint!


What in the world would I do without spray paint?  I would either be spending a lot more money, or be living with nasty ugly brass, and yellowy old looking wood blinds!

I really wanted to do something about these ugly blinds in our front living area.  I do like blinds for privacy sake, and they are actually in really good condition, and are good quality thick heavy blinds - just an ugly color.  So instead of shelling out $80+ for new blinds, I thought we would give spray painting them a try.  I googled and googled and looked all over my favorite design blogs and couldn't find anyone who had ever spray painted their blinds.  I was concerned that this really wouldn't work out well, but if I figured even if I mess up, I'll have to get new blinds anyway!  So it was worth a shot.


Luckily we have a swing set in the backyard, so we took the blinds off the window and took the swings off of the swingset and hung them there:


Hi Jarrod's feet!

Then commence spray painting:


I chose an espresso satin finish rustoleum paint.  It really worked out well!  I can tell they are spray painted, but whenever I tell people who come over they can't believe it. 

A reminder of the horrible before:


And the refreshing after:


Here are some other quick fixes you can do with spray paint:

Ugly brass door knobs:


Into sleek brushed nickel door knobs


Again, brass knobs:


Brushed Nickel knobs:


Nasty outdated brass cabinet hardware:


Into contemporary brushed nickel harware that pops off the new chocolate finish:


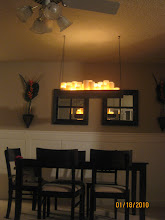
Now I need to tackle some ugly brass light fixtures until we can replace them.  I'm not suggesting that these are great permanent solutions, but we just didn't have the budget to replace things like hardware, blinds and light fixtures and I certainly wasn't going to live with them the way they were!  And since I don't notice how ugly they are anymore, replacing them will come WAY after we finish other major projects.

What have you spray painted?  How did it turn out?  What is your favorite spray paint?

Sunday, October 11, 2009

What?!?! You Wallpapered your bedroom?


I am participating in Rhoda's Beadboard wallpaper party over a Southern Hospitality.

When purchasing a home, I dreamed of something with character and architectural interest. We did get a cute little 50s home, but it didn't come with quite the character I was crossing my fingers for.

So I put it in myself!

I knew we were going to do beadboard or wainscoting of some sort in the master. We used beadboard panels on our kitchen peninsula, which turned out AMAZING! I'll reveal the kitchen soon, I promise - we just got our oven yesterday.

Then one day, I stumbled across THIS POST!!!! I couldn't believe it! I yelled for Jarrod to come look as quick as he could. "LOOK HONEY, THEY MAKE BEADBOARD WALLPAPER!!!" Of course, he didn't share quite the same enthusiasm as I did about this new found treasure. Then I told him how much it would save us to do the wallpaper in lieu of the paneling - and he perked up a little bit more.

Remember my vision for the room?


It's still a work in progress, the chair rail and baseboards need to be caulked, then I'm going to paint all the trim and the wallpaper itself a glossy white.


I would show you more angles of the room, but you would see some pretty awful paper blinds that have paint on them because I wasn't careful when painting because I knew I was replacing them. I am on the lookout for fabric to do a nice DIY roman shade there.

I hesitate though, because I'm not sure I love the wall color after all. I love the blue a lot, and I picked it because I wanted a stark contrast - but I think this is way too stark. I also had these bed linens to work with, and new bed linens were not in the budget.

What do you think? Any suggestions?

Power Point

Welcome to all who are here from Between Naps on the Porch

I wish I knew how to use something fancy like AutoCad, or even photoshop - but I don't.  For a while, I was the Business Development Manager for a major food brokerage company.  This fancy title meant I was in charge of making the presentations that our senior executives used to sell their business to other senior executives at retailers like Kroger, or manufacturers like Kraft. 

So, I just played on powerpoint all day.  That's where I am most comfortable.  If I have to make anything on the computer, I at least start with power point.  My header up there?  Yep, powerpoint.

Not exactly sophisticated or cutting edge, but it helps me to visualize, or help others visualize those ideas constantly swarming around in my head.  Here are a few examples:

Levi's Nursery:


It's still a work in progess.  I am going to do chalkboard paint, a mirror for him to play in front of, a toybox of some sort below his window and a window treatment:


Our Front living room.


Those blinds used to be a nasty ugly natural wood yellowy color, and we just spray painted them to look like dark wood blinds.  I didn't think it would actually work, but it turned out great!


  Another angle of our living room with my CRAZY EASY WALL ART!


The original play was to do four of these panels, but I only ended up with three.  I may add another later, because I feel like the space looks blank still.  What do you think Im missing?


Curly bamboo was too expensive for me, but I found these plants at Pier 1 for only $4 each!


This was posted on Met Monday!

Saturday, October 10, 2009

Wallpaper Art

I love Thrifty Decor Chick!  She always has great ideas, and when I saw this post - I just had to do it. 

I chose my entryway "niche" for this project:


This art project was really easy.  It is just canvases covered in textured wallpaper that I painted. Lowes had their textured wallpaper on sale for something like $3 and I already had the canvases from another project that failed miserably.

I covered the canvases in wallpaper, then painted them (our cabinet color). Then I took a little of the paint I used on the wall that these go on and mixed it with the brown to make a slightly lighter hue. I very lightly rolled over the canvases with this color, and it highlighted the raised part and it barely touched the parts that weren't raised giving it a distressed look. Then I went over the raised parts again with a small brush with the plain wall color.


The Lovely mirrored creepy entryway before:


The pretty and thrifty after (thanks Sarah!!)


Total Cost?  $13!!! (2.50 for each canvas and $3 for the wallpaper)

Crazy Easy Wall Art!!!


I saw this idea in a Lowes Creative Ideas magazine and thought it was amazing.  I wish I had thought of it myself!


In the Lowes magazine, they used high quality stainable wood boards.  I opted for the more economical canvases:

Step 1. Paint your canvas that you got at JoAnne's for 50% off of $15.99 (or at least pretend like you're painting it because you forgot to get a picture of actually painting it. Don't forget your fake candid picture smile!)


2. Step 2- Align your rubber doormat that you got at Target for $19.99 on top of the canvas. The Doormat was slightly bigger than the canvas, so we taped off the outside border from the back.


Step 3. Apply your really cool $3.99 make-a-gun out of your spray paint can thingy (don't worry dad, it's not a real gun)


Step 4. Apply quick thin coats of spray paint


Step Five: Lift your doormat stencil off the canvas to reveal a BEAUTIFUL piece of art. Swoon.


Although I was originally planning on doing 4 of these, like I pictured here:


I decided on 3 because you're supposed to do things in odd numbers in design. It's a rule, I didn't make it up - but I think I might want to do 4 after all.  What do you think?


A huge thanks to Kimba at A Soft Place to Land for hosting DIY day.  Be sure to check out the party for other great ideas!


Friday, October 9, 2009

Big impact - Small budget. Faux Wainscoting


After finishing my mirror project, the dining wall just looked so plain.  It's a long wall with a lot of blank space, and I wanted it filled. 


Keeping the Tuba player's budget in mind I decided to do a faux wainscoting treatment that I've been wanting to do forever.

So I went to home depot and loaded up with some boards and got to work.  This whole project cost less than $40 and took one evening to install. 

I wanted the wainscoting to be somewhat on the tall side so I got some 4 foot boards (1/4 inch thick) and had them all cut at the same time to 3 feet.


We spaced them about 20 inches apart:


Then put one all the way across and topped it off with a chair rail:


Then it was PRIME TIME


And after two coats of paint, this is the final product:


Before:


After:


Just a few hours and around $35, and a huge transformation.

Thanks to between naps on the porch for letting play in your Metamorphosis Monday
feel free to take a look around at the rest of my projects, and stay tuned for more!
Related Posts with Thumbnails